Choosing the correct Rear Ball Bearing is not a small parts decision. It affects wheel stability, noise, braking confidence, and service life.
Grand View Research’s Automotive Bearings Market Size, Share & Trends Analysis, 2024–2030, links bearing demand with vehicle production, replacement cycles, and electrification. That growth creates more choices, but also more confusion. Product photos can look identical. They are not always interchangeable. A bearing with the wrong internal clearance may overheat. A poor seal may admit water, salt, and fine road dust. Small errors become expensive.
Fitment matters most.
ISO 281:2007 provides the basis for bearing rating-life calculations. It considers load capacity, speed, and operating conditions. However, catalog life is not a guarantee of real-world performance. Road impacts, corrosion, installation force, and misalignment can change the result. This is where practical inspection becomes valuable. Check the exact vehicle application, dimensions, load rating, sealing design, material quality, and ABS encoder position. Verify every number against the manufacturer’s catalog.
The World Bearing Association has also warned about counterfeit and misidentified bearings in global supply chains. A low price may hide uncertain steel, inaccurate tolerances, or weak traceability. That risk deserves attention.
Even experienced buyers miss details.
These seven tips explain how to compare suppliers, confirm specifications, inspect packaging, and avoid premature failure. They also encourage a necessary question: is this bearing truly suitable for the vehicle, or merely advertised as compatible? That distinction protects both safety and budget.
7 Tips for Buying the Right Rear Ball Bearing
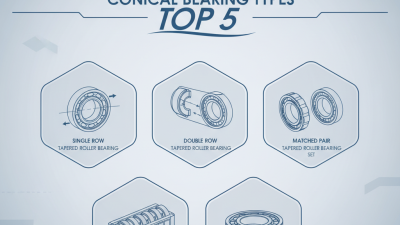
Understanding rear ball bearing types helps you match the bearing to its real working conditions. Sealed deep-groove bearings suit many rear wheel hubs. They handle radial loads and moderate side loads. Double-row angular-contact bearings manage cornering forces more effectively. Cartridge-style units often include seals, flanges, or integrated speed sensors. Check the vehicle or machine design before choosing a replacement.
Measure the inner diameter, outer diameter, and bearing width carefully. A difference of one millimeter can cause poor seating or early failure. Check the load rating, operating speed, and required internal clearance. Heavy loads need stronger support. High temperatures require suitable grease and sealing materials. Muddy roads demand effective contact seals. Clean, dry housings matter too. They are often overlooked.
Inspect the mounting fit, shaft surface, and hub bore for wear. A loose fit may create vibration and fretting marks. An overly tight fit can damage the races during installation. Never press through the rolling elements. Apply force only to the ring being fitted. I once treated a noisy bearing as the only problem, but the worn hub was also responsible. That mistake was expensive. Listen for humming, feel for play, and check heat after a short test. Manufacturer specifications and a qualified technician should guide the final choice, especially where braking or steering loads are involved.
7 Tips for Buying the Right Rear Ball Bearing?
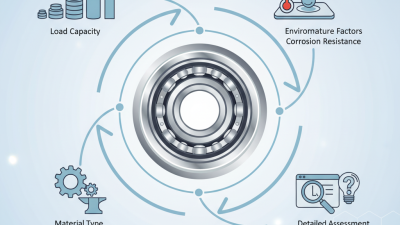
A rear ball bearing supports rotating loads, but the correct choice depends on more than its outside shape. Check the vehicle service manual and compare the bearing’s load capacity with the axle’s operating demands. Heavy loads, rough roads, and frequent towing can increase stress. A bearing that feels adequate during a short drive may wear quickly under repeated pressure. Do not guess here.
Tip 1: Check load capacity. Look for radial and axial load ratings, not just the bearing size. Higher capacity is not always better if it changes fitment or rotation resistance.
Measure the old bearing only after removing dirt and rust. Record the inner diameter, outer diameter, and overall width with a precise caliper. Even a small measurement error can create looseness, noise, or difficult installation. Some listings show rounded dimensions, which can be misleading. Recheck the measurements twice.
Tip 2: Confirm dimensions against the vehicle’s axle specification. Compare the seal position, mounting style, and internal clearance. Then verify vehicle compatibility using the exact model year, engine type, drivetrain, and rear axle configuration. Similar vehicles may use different bearings. This is where many purchases fail.
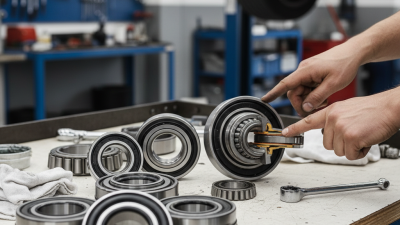
Tip 3: Inspect the bearing’s condition before installation. It should rotate smoothly, without grinding or side play. Keep the work area clean, and follow the specified installation direction and torque values. I have seen incorrect pressing damage a new bearing before the vehicle moved. If the service data seems unclear, pause and ask a qualified technician to verify it.
| Tip | What to Check | Real-World Data or Reference | Vehicle Compatibility Considerations | Recommended Action |
|---|---|---|---|---|
| 1 | Confirm the bearing type | Rear wheel assemblies may use a single-row ball bearing, double-row ball bearing, tapered roller bearing, or a complete hub-bearing unit. A double-row bearing can support radial loads and axial loads from both directions, while a sealed hub unit may also contain a flange, wheel studs, or an integrated speed sensor. | The replacement must match the original assembly design. A loose bearing cannot replace a complete hub unit unless the vehicle’s service design specifically allows it. | Identify the original part configuration before comparing dimensions or prices. |
| 2 | Verify dynamic and static load capacity | Dynamic load rating, usually marked C, relates to repeated rotation under load. Static load rating, usually marked C0, relates to deformation when the bearing is stationary or moving slowly. For example, a bearing specification may list a dynamic rating of 30 kN and a static rating of 20 kN; these values are not interchangeable. | Consider vehicle weight, rear-axle load, passengers, cargo, towing, cornering forces, and road impacts. The selected bearing should meet the vehicle manufacturer’s required rating with an appropriate safety margin. | Compare both C and C0 ratings with the original specification; do not select by outside size alone. |
| 3 | Measure all critical dimensions | Check bore diameter, outside diameter, overall width, flange diameter, flange offset, bolt-circle diameter, mounting-hole size, and wheel-stud spacing. As a measurement example, a bearing marked 25 × 52 × 15 mm has a 25 mm bore, a 52 mm outside diameter, and a 15 mm width. | A difference of even 1 mm can prevent correct seating, alter preload, or cause contact with the hub, knuckle, axle shaft, brake rotor, or dust shield. | Use a calibrated vernier caliper and compare the measurements with the service specification or original component. |
| 4 | Match the vehicle application | Confirm the exact model year, body style, engine, drivetrain, rear suspension design, and production break. Two vehicles with the same model name may use different rear hubs or bearings because of axle, brake, or electronic-system variations. | Rear-wheel-drive, front-wheel-drive, and all-wheel-drive versions can use different bearing arrangements. Some applications use an axle bearing, while others use a wheel hub bearing. | Verify the vehicle identification number or full application details against a reliable parts catalog or workshop manual. |
| 5 | Check speed-sensor compatibility | Some rear hub assemblies include a magnetic encoder ring or tone ring for the anti-lock braking system and wheel-speed control. The encoder may have a specified magnetic side, pole pattern, and sensor gap. | Installing a bearing with the encoder on the wrong side, with an incorrect pole pattern, or without the required sensor feature can trigger ABS, traction-control, or stability-control warning lights. | Compare the sensor type, encoder position, and connector orientation with the original unit before installation. |
| 6 | Inspect sealing, clearance, and operating temperature | Automotive rear bearings commonly use contact seals to retain grease and exclude water and road dust. Internal clearance and grease selection must suit the bearing design and operating temperature. Excessive clearance can cause play, while incorrect preload can create heat and premature failure. | Vehicles used in rain, snow, off-road conditions, or with frequent towing require effective sealing and correct lubrication. A bearing intended for general industrial use may not have the necessary automotive sealing or corrosion protection. | Choose a sealed automotive-specification assembly and avoid modifying the factory grease or seals. |
| 7 | Confirm installation and torque requirements | Correct installation may require a press, snap-ring removal, a new axle nut, and a specified tightening sequence. Torque values vary significantly by vehicle and fastener size; they must be taken from the vehicle service documentation rather than estimated. | Incorrect torque can cause bearing looseness, overheating, damaged threads, rotor runout, or early failure. The bearing should be pressed only through the correct race to avoid brinelling. | Replace one-time-use hardware when specified, follow the service manual, and check wheel play and ABS operation after installation. |
Choose the bearing by load, speed, temperature, and shaft fit, not by size alone. A rear bearing may face radial loads, cornering forces, vibration, and road dust. Check the manufacturer’s dynamic load rating against ISO 281:2007 calculations. Its basic rating life represents 90% reliability, not a guaranteed service period. That distinction matters.
Material selection changes performance. Chrome steel usually suits moderate loads and controlled temperatures, while stainless steel offers better corrosion resistance but may carry less load. Ceramic balls can reduce friction, yet their price and brittle behavior may not suit every rear assembly. Seals deserve equal attention. Contact seals block water and grit effectively, but they create more drag. Non-contact shields reduce friction, though contamination protection is weaker. Select the seal for the environment, not appearance.
Inspect manufacturing quality through hardness consistency, raceway finish, dimensional tolerance, and grease fill. ISO 15243:2017 identifies common failure patterns, including fatigue, wear, corrosion, and electrical damage. Ask for inspection records and batch traceability. A clean-looking bearing can still hide poor geometry. I have seen fit errors ruin good components. The U.S. Department of Energy’s Motor System Market Assessment notes that motor-driven systems consume about 46% of global electricity, making small efficiency losses worth examining. Still, chasing the lowest friction can be a mistake when sealing is inadequate. Verify clearance, preload, and installation tools for the actual rear application.
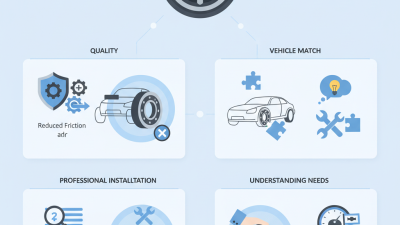
When buying the right rear ball bearing, brand reliability deserves close attention. A familiar logo is not proof of consistent quality. Review the manufacturer’s production history, testing records, and traceability system. A dependable supplier should provide accurate dimensions, material details, clearance ratings, and seal specifications. Ask for the batch number and technical data. Documentation matters.
Certifications can support your decision, but verify them carefully. Check the certificate number with the issuing organization. Confirm its scope, validity, and connection to the actual bearing or factory. A copied certification logo means little. Independent test reports are more useful when they identify the sample, test method, and inspection date. In my workshop experience, small differences between packaging, bearing markings, and certificates deserve attention. I have ignored one before.
Warranty terms reveal how seriously a supplier supports its product. Read the coverage period, installation exclusions, storage conditions, contamination limits, and return process. A longer warranty is not always better. A clear claim procedure matters more. Ask who handles inspection, replacement, and shipping costs. I once selected a cheaper bearing with vague warranty language. The replacement took longer than expected. That mistake was mine. Keep invoices and photos, then inspect the bearing before installation. It should rotate smoothly, without roughness, noise, or visible damage.
7 Tips for Buying the Right Rear Ball Bearing
Planning the installation early can prevent expensive mistakes. Measure the bearing bore, outer diameter, and width before ordering. Check the vehicle’s service manual for the correct load rating and fit. A bearing that looks similar may still have the wrong clearance. I once underestimated this detail and delayed a repair by two days.
Installation needs clean tools, steady support, and the correct pressing method. Never hammer directly on the rolling elements or seal. Use a calibrated torque wrench for the axle nut and mounting hardware. Incorrect torque can create heat, noise, or early wear. A qualified technician should inspect the hub, shaft, spacer, and seal during installation. Shortcuts are rarely cheap.
Maintenance costs depend on road conditions and bearing design. Sealed units usually need no added grease, but they still require regular inspection. Listen for humming, grinding, or changes during turns. Check for looseness when the wheel is safely lifted. Keep records of mileage, symptoms, labor, and replaced parts. Long-term replacement costs may include labor, corrosion removal, damaged sensors, or a new hub assembly. Ask for a written estimate before work begins. Prices can change. Budgeting only for the bearing is an easy mistake.
Plan installation, maintenance, and long-term replacement costs by checking load capacity before choosing a rear ball bearing.
Chart explanation: The estimated L10 rating life is calculated using the ISO 281 basic rating-life equation for ball bearings: L10 = (C/P)3 million revolutions, where C is the basic dynamic load rating and P is the equivalent dynamic bearing load. A lower load ratio generally increases service life significantly.